What is "From Scratch?"

When it comes to cooking, it's all about creating. Before you can eat, you must compose. As grocers, corporations, celebrities, and Chefs make more and more food "convenient" ultimately, their taking away your ability to trust your own palate and creativity, and replacing those senses with nothing more than assembly line instructions. A package of this, and a bottle of that, isn't what stirs up memories of your grandmother, and doesn't make you beam with pride when you pull your creations from the oven. I prefer to have flour from head to toe, a rigged apartment smoke alarm, and to feel the excitement of knowing that I am self sustainable, creative and spent an afternoon (into the evening) to make something I thought you could only buy.

The purpose of this blog isn't to give recipes that will feed a family of 4, in ten minutes, on a Wednesday. There is plenty of that already. This blog is about reclaiming our heirloom recipes, learning how to avoid the bar code when shopping, and ultimately, it's about cherishing the hours we spend at the stove, not trying to condense them.

By your self, with your friends, your kids and loved ones, I encourage you to take a look at what we can create to nourish, entertain, and gift....From Scratch.

Sunday, September 26, 2010

Applesauce

I am a cheerleader for Summer. Every year, I applaud the hot, dry air. I enthusiastically encourage the parades, the BBQ's, the sundresses, and the vacations. I revel in the double scoop ice cream cones, the fireworks shows, the way country music just sounds better in the summer. And, last but not least, I love that I can extend my pool/bike/park/picnic time into my mid 20's with no guilt, due to the invention of spray sunscreen. (Finally! Pale girls, can I get a fist pump?) For me, it's the feel good, all smiles, put the top down on the VW, kind of months I can't resist.

But....about this time of year, I get this thing, this little voice in the back of my mind, this little butterfly in my stomach, that lets me know, the harvest is here, the seasons are changing, Summer is over girl. It's time to move on. I go through it every year. I get that weepy, September thing. The back to school, leaves are changing, sun is setting, sweater weather, I want to give out bouquets of freshly sharpened pencils just like Meg Ryan in "You've Got Mail" kind of thing.

As a (so-called) adult, this transition has become less traumatic, since there is no lurking image of the dungeon some may call a "classroom" in the distance. (School never was my forte, I showed up mostly for the boys, lunch period and occasional drama productions that required you to maintain some kind of presentable GPA in order to participate)

But Spring fever?? Forget it. I've got Fall Fever. It comes on each and every year, and this year in particular, it's right on time.

I find myself at San Francisco's famous Ferry Building farmers market, where produce, cheese, breads, fish, meats, pickles, and more are beautifully displayed. Few things do for me what first-of-the-season produce does, and this year's apples were no exception. Bright red, pink, yellow and green apples, all the varietals screaming, "This is it! It's fall!" I stood, trapped between two farmers' booths, one featuring the last round of heirloom tomatoes, dirt cheap by the pound, and the other with baskets of shiny, small apples, begging to be brought home. I felt like a parent, trapped by the age-old question of which child they love more. (For the record, I love apples and tomatoes equally, but strawberries seem to have formed a special bond with me)

At the end of the morning, I embraced the Autumn, and headed home with a few pounds of California apples.

Maybe I am a summertime girl at heart. But one thing is for sure. I was about to "Fall" in love, all over again....

 Chai Ginger Applesauce, From Scratch
3 pounds organic apples, any variety you prefer
2 organic oranges, juiced
2 organic chai tea bags
2 inch piece of fresh ginger, peeled
1/2 cup dark brown sugar
1 tablespoon cinnamon

Our inspiration


Rolling the peeled apples in juice will keep them from turning brown.


To begin, cut both oranges in half and squeeze the juice into a small sauce pan. Bring the orange juice to a boil and drop in both tea bags. Remove from heat and let steep for 3-5 minutes. Discard tea bags, and let the juice cool while you peel all the apples, rolling each one in the tea infused juice to coat, before moving onto the next step.

*A little tip from the amazing Ina Garten--save the peels from 2 of the reddest apples, and tuck them into your simmering sauce. This will help keep the sauce pink.*

Once all the apples are peeled, cut them into wedges, removing all the seeds and core. Place into a large bowl, add the juice, and grate the ginger over the apples. Add the cinnamon, brown sugar and reserved apple peels and toss together.
Don't think ginger is the only thing you can add. Try any spice you like!


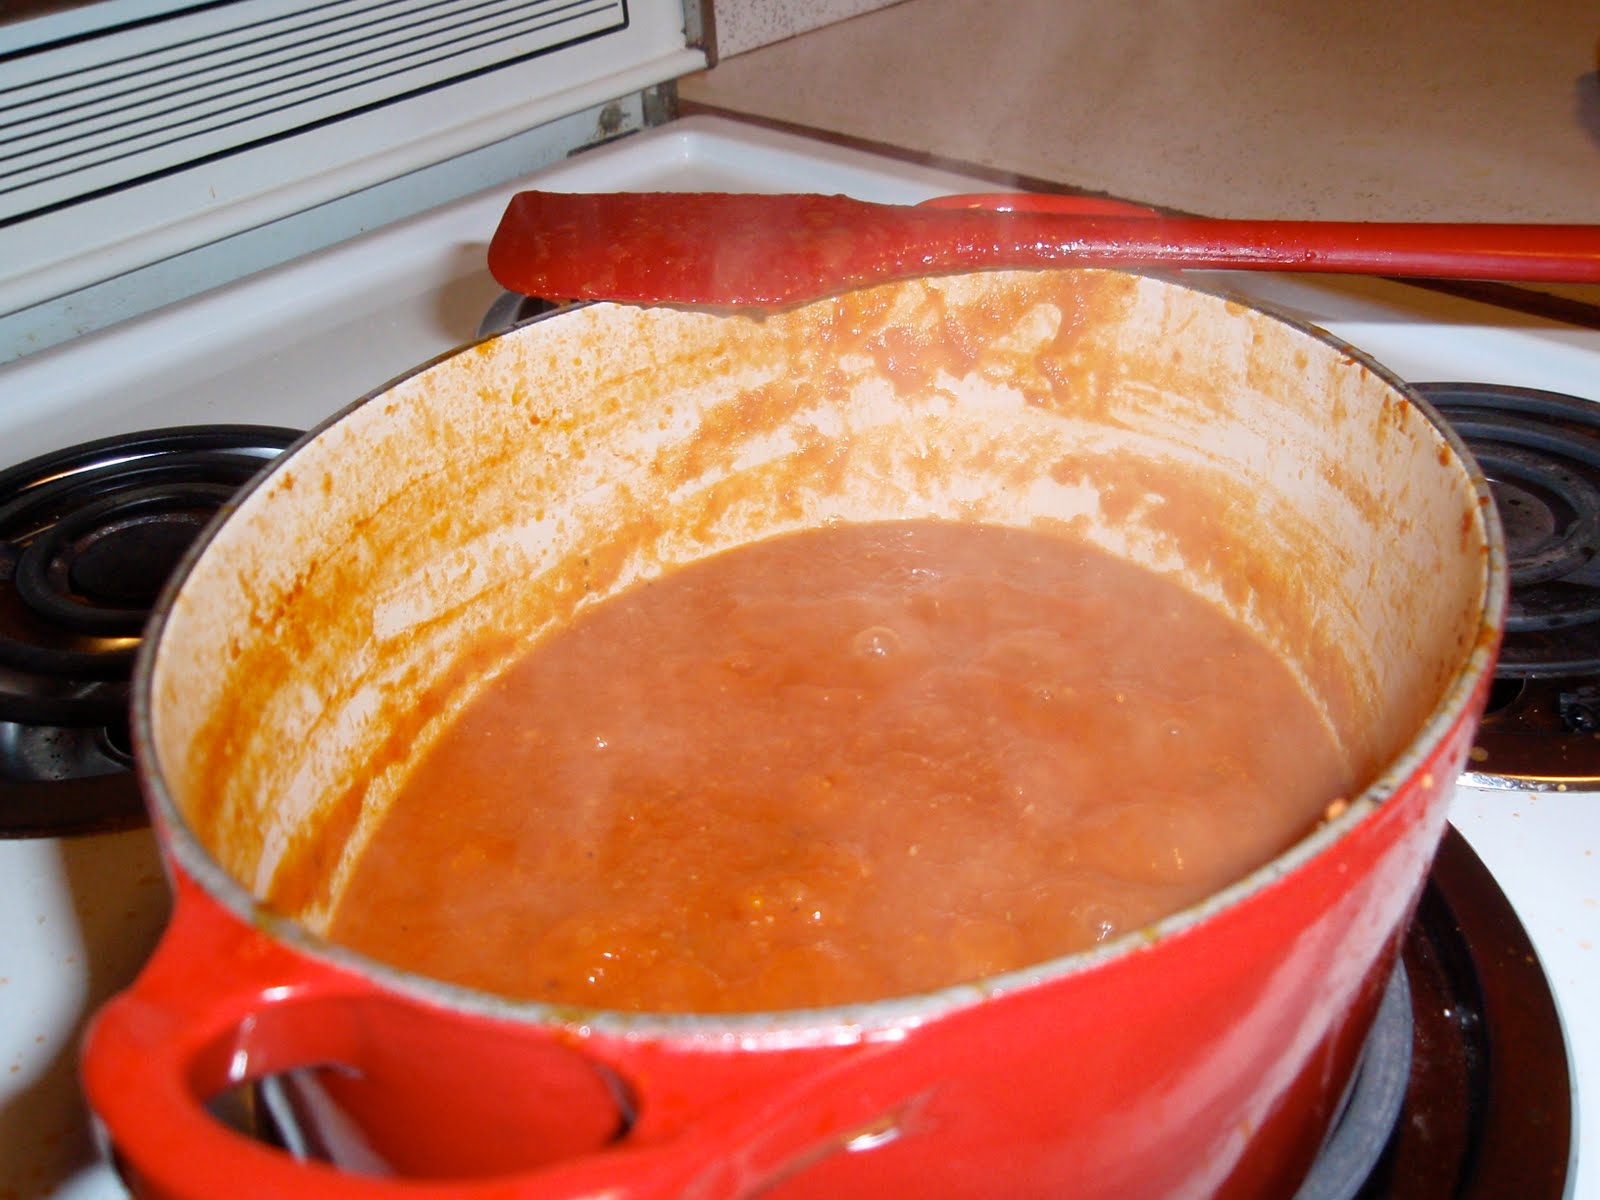
Transfer apples to a large pot or dutch over, a bring to a simmer over medium heat.
3 pounds of apples will yield just under 3 cups of sauce.

This will smell divine!
Once you have achieved a simmer, place the lid on the pot and place into a 350 degree oven for about an hour, until the apples are soft. If you don't have a tight fitting lid, aluminum foil will be fine. Once the apples have cooked, remove them from the oven and let cool slightly. Using tongs, remove and discard the 2 peels. Next, using a whisk or a potato masher, crush the apples until smooth. They should still have some texture. Remember, you're not making baby food. Let cool slightly, but PLEASE enjoy this while it's warm.

Sunday, September 19, 2010

Hummus

According to my (poor) math calculations I have spent almost $300 on store-bought hummus this year. It's one of those items that ends up in my basket every shopping trip, and is included in one form or another in just about every snack break. It's gaining big popularity in the grocery stores too, being sold at big name shops, corner stores, and farmer's markets. But the price point is so inflated! I saw one brand at my organic market that was almost $7.00! Making hummus yourself not only saves you big money but gives you the opportunity to try different flavors and combinations, as well as control the amount of oil and salt. This recipe can be made using canned chickpeas, but when made with fresh, the flavor and texture can't be beat. For advice on how to cook dried beans, check out the "Cowboy Caviar" article I wrote.
  http://www.divinecaroline.com
The method could not be easier, everything is spun in the food processor and can be stored for up to a week in the fridge, although a tub of hummus has never lasted beyond 24 hours in my fridge. I love to dip tortilla chips into it, or if I am nutritionally behaving, baby carrots. Try hummus in place of mayo on a turkey sandwich, bring it to the next party or picnic, or thin down with lemon juice and use it as a dressing on Greek salad.  Kiss the store bought stuff good bye, you're in for a treat!

Hummus, from scratch
  • 3 cups cooked chickpeas or 2 15 oz. cans organic chickpeas, 1/2 cup of beans reserved
  • 2 tablespoons tahini (seasame seed paste, found in the peanut butter isle)
  • Zest and juice from 1 lemon
  • 3 garlic cloves
  • 1/3 cup olive oil
  • 1/4-1/2 cup water or reserved bean liquid
  • 1 tablespoon ground cumin
  • kosher salt, to taste

All our supplies


Because this recipe only has a few ingredients, and nothing is cooked, it's important that everything be high quality. Use organic ingredients, and a finishing extra virgin olive oil. 
To begin add garlic cloves to food processor and pulse until finely chopped. Add your chickpeas, zest, cumin and lemon juice and tahini and puree until smooth. With the motor running, stream in the olive oil. Season with salt.
Loading up the processor

 If the hummus is thicker than you desire, thin it down with reserved bean liquid or water until you
achieve the consistency you desire.
30 seconds later, it's hummus!
Move hummus to a large mixing bowl, and fold in remaining chickpeas. I like this method because it produces a hummus with some texture, but it's totally optional.
Drizzle a little olive oil over the top before serving. 

So easy!

Once you have made hummus from scratch, you will never buy store bought stuff again! This recipe is very basic but, the flavors of hummus you can make are endless, so don't be afraid to try out all kinds of combinations.There are dozens of variations for hummus and you can flavor it anyway you like. These are a few of my favorite variations.
  • Add 1-2 tablespoons hot chili sauce (Sambal) for spicy hummus
  • Puree 1/2 an avocado in with your chickpeas for a smooth, veggie hummus
  • Change out chickpeas for black beans, and replace lemon with lime
  • Change out chickpeas for cannelini  beans, the tahini for pinenuts, and add chopped sage instead of cumin

Sunday, September 12, 2010

Ketchup

My friend Dan tells a great story about traveling in Italy as a picky American eater. When he sits down at a neighborhood trattoria, exhausted, confused and starving, he tells the waiter he wants "noodles and red sauce" The Italian waiter returns, with what else, but a bottle of Heinz 57 and boiled spaghetti. While this may not have been what my friend was looking for, it does go to show that all the world over, Americans love ketchup.
Growing up, I fondly remember it slathered on an array of foods. In fact, I have a hard time remembering a dish before the age of 16 that didn't benefit from a glug of the crimson condiment. Mac and Cheese, Chili, grilled sandwiches, eggs, and of course, where would Mom's meatloaf be with out it? As my fellow Utahans know, ketchup plays the supporting role in the one and only "fry sauce" --an epicurean achievement of half ketchup, half ranch dressing which holds the power to be delicious even drizzled over garbage. Anyone who visits the Beehive state will soon find that this sauce is valued about as highly as our famous snow.
But as we grow older and more aware, we must ask ourselves self, what IS in that? How did it get to my table? Is it sustainable enough to wind up on my children's table? Commercial ketchup is, sadly, filled with false sugars, colors, and stabilizers that do us no good. Fortunately, the alternative is easy and FUN to make. And I gotta say, it turned out GOOD. Slightly sticky, flavored with apple cider vinegar and a warm spice blend that showcases the tomatoes, instead of covering their natural flavor.
I chose to use fresh, heirloom tomatoes because their abundance this early September is practically blocking the door to my local grocery store. But if hamburgers are on the menu in March, the recipe works fine with canned tomatoes (Or better yet, the ones you jarred yourself!)
At first I worried that the multiple colors of heirlooms, with their pastel stripes and green hues, would produce a ketchup that was not the bright red color we're accustomed to, but I think this really shows the spirit of this blog. The tomatoes determine the ketchup, not the other way around. As I stood at my counter, I felt a twinge of guilt for wishing away these unique characteristics in my fruit. I took a moment to remind myself of the one lesson that several  Bay Area Chefs have instilled in me: Respect your produce.

In the end, these beautifully grown babies were simmered and shown off in my anti-shelf stable staple, and later enjoyed with hot, salty frites and a glass of Champagne. A fate that any good tomato could hope for.

Ketchup, From Scratch
3 pounds, fresh tomatoes
1/2 yellow onion, diced
3 garlic cloves, minced
1 inch of fresh ginger, minced or run down the microplane
1/4 cup organic dark brown sugar
1/4 cup organic apple cider vinegar
1/8 teaspoon each of the following spices:
black peppercorns
coriander seeds
fennel seeds
cloves
1 star anise
2  fresh laurel bay leaves
Kosher salt, to taste
All our supplies....
 Use the biggest, deepest pan you have (something you would boil spaghetti in is perfect) I chose a smaller pan, and learned this stuff can splatter.

My freckled stove top....Use a big pot, and you can avoid this

Heirloom tomatoes, perfection in the imperfections


  To begin, wash your tomatoes, and using a small knife, remove the cores.

By coring the fruit, instead of slicing off the top, you get more yield from your tomato.


Slice the tomatoes in half. Working over a large bowl, squeeze the seed packets and some of the excess juice out. No need to wring dry, but removing the majority of the seeds will make for a smoother, sweeter ketchup. (If you have the desire, you can strain the seeds off the juice and make a delicious Bloody Mary.)
 Chop your tomatoes in bite size pieces, and puree in the food processor until fairly smooth. Season with a pinch of salt.
In a large pot, over medium heat, saute your onions in canola oil, until they are soft and translucent. Do not let them brown. Add your garlic and ginger and cook for 2 minutes more.

*At this point, I added my spices loose, and found this to be a mistake, as later I had to strain the whole thing to get the spices out. You can avoid this by tying up all the spices in a cheese cloth or tea strainer, and remove the whole thing in one go.
This will smell amazing

So, that being said, add your spice sachet, as well as your tomatoes to the pan, and bring to a boil. Reduce the heat to a simmer, add your sugar and stir as it melts in. Add half your vinegar, reserving the 2nd half for seasoning later. By adding the vinegar in two steps you achieve a richer, more balanced sauce. Because the sauce reduces and cooks for nearly 3 hours, the second addition of vinegar adds freshness you would normally cook out. 

And now we wait...
.
Let the sauce simmer, stirring occasionally, until it is as thick as commercial ketchup.
The thicker it gets, the more you need to stir it, to avoid scorching it on the bottom of the pan.
It should reduce, losing more than 3/4 of your original liquid.
Is it Ketchup yet?


When it is reduced to consistency, remove from the heat. Season with salt, and reserved vinegar.

Now... the single most important thing you can possibly do when cooking from scratch....

TASTE IT. 

Think about what it tasted like. TASTE IT AGAIN! Add more salt, vinegar or sugar, until you are mad with desire for french fries! I found I liked mine with a bit more vinegar and took it easy on the salt. But, hey, it's your ketchup. Do it up.
Homemade Ketchup. Eat some while it's still warm

If you want your ketchup as smooth as commercial ketchup, you can puree it further in the food processor or blender and pass the sauce while it's warm through a fine mesh strainer.

Let the condiment cool, and store in any jar or bottle you saved from your previous store bought items.

Ready to be stored, but not for long!


Please remember that homemade ketchup is natural and has no preservatives. (That's a good thing!) Because of these reasons, it's important to label the ketchup and use it long before you would your Heinz stuff, that's been on the door shelf since....whenever.


Best midnight snack ever 

Sunday, September 5, 2010

Marshmallows

I thought Marshmallows would be the perfect jumping off point for From Scratch. To me, the marshmallow is a memory trigger for childhood summers spent at Girls Camp, eating S'mores. When I see the tiny ones, I always think of making rice krispies with my Mom, and she would let me lick all the melted marshmallow fluff off the spoon. This whimsical puff can build grown up memories too, when made with love and attention,and real ingredients. This once over processed, chemical filled sponge, can become a sweet snack, flavored for any occasion. I went classic, making vanilla scented sweets, but tried a variety of shapes when it came to cutting them. Making these, I felt a major scene of accomplishment when I was snacking on the results.  I realized that even though they were so sugar coated, somehow they still tasted wholesome. I recognized it a candy on my lips, but they had a toothsome quality of real cooked sugar, not the false, slightly fizzy texture of store bought marshmallows.
But I don't want to sugar coat it for you,
So here is your fair warning.....
It was MESSY! Like sticky, gooey, chewed up gum on your sneaker messy. But honestly, nothing some hot soapy water didn't fix. And if you adhere to my strict  "everything lightly oiled" method as described below, your in for some sweet stuff. I encourage all of you to make a batch, get them on skewers and fire up the grill. And yes, Graham cracker recipe, coming soon...
  
 Marshmallows, From Scratch
2/3 cup water, divided
3 (1/4 oz.) envelopes unflavored gelatin
1 cup granulated sugar
1 cup organic corn syrup
1 teaspoon vanilla extract
1 cup powdered sugar, for dusting

Our supplies...


Using a paper towel dipped in vegetable oil, grease the insides of an 8x8 baking dish. Coat with powdered sugar, and set aside.
Pour 1/3 cup of the water into the bowl of your stand mixer, fitted with a paddle attachment. Sprinkle gelatin over the water, and let sit for 10 minutes, until the gelatin has softened and bloomed.
While the gelatin is blooming, use a medium sauce pan to combine sugar, corn syrup, and remaining water. Stir to combine and place over medium heat. Cook with out stirring, until a candy thermometer reads 240 degrees.

Getting warmer...


Keeping a small pastry brush in a little cup of water nearby will be useful for brushing down the sides of the pot, keeping the crystals on the sides from burning.


Letting the mixer do the work..

 Once your mixture has reached the proper temperature, turn your mixer on low and slowly stream your sugar into the gelatin. Once you have incorporated all the sugar turn the mixer to medium-high and let beat for 8-13 minutes until the mixture is white, fluffy and VERY sticky.


 Now...This is the part where you need to work fast and be prepared with all the tools, or your going to end up like me and look like Stay-puff attacked your kitchen.

Me, mid-mess. Please follow the "everything lightly oiled" rule!
Have a shallow bowl of vegetable oil sitting close by. Anything that is going to touch that mixture (hands, spatula) needs to be lightly dipped in oil first, and this should give you trouble free results.
So, using that lightly oiled spatula, scrape the mixture into the pan, and using those lightly oiled hands, press into a uniform flatness. Set aside, and let set and cool for a half hour or so.

Made it to the pan...Whew!

Generously dust your counter top with powdered sugar, and invert the pan onto your prepared surface. You may have to use a small (oiled!) spatula to help you remove the block from the pan.


Out of the pan, ready to be shaped


Now, using a small sharp knife, cookie cutters, and a ruler, go to town! Make any shape, or size you want.

To make the standard tube shape, cut the marshmallows into 1 inch strips, and roll with your hands before cutting into pieces. The treats will keep, up to a week in a zip top bag with extra powdered sugar tossed in. Enjoy!
All the shapes, including minis!


Just so you know: 
You will have some trim left over, just as you would with sugar cookies. Because this recipe calls for hot liquid sugar and lots of sticky mess, it's best to send the little ones out to play, and have them return to help make rice krispies from these pieces. 


The majority of From Scratch is my original recipes, but when it comes to baking and candy making, I know to leave well enough alone. The quantity's and temperatures in this recipe have been adapted from "Jam it, Pickle it, Cure it" by Karen Solomon.
Made with lots of love